Description
For Outdoor Long-Distance Alignment
“Line It Up and Lay It Out . . . . Just One Time”
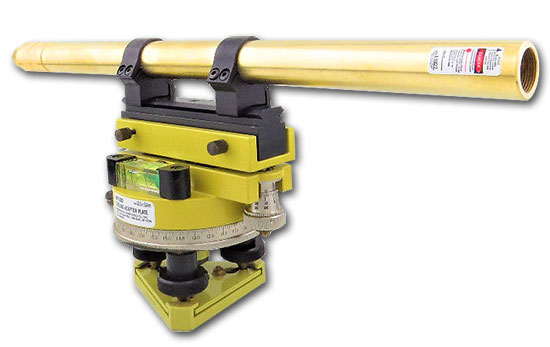
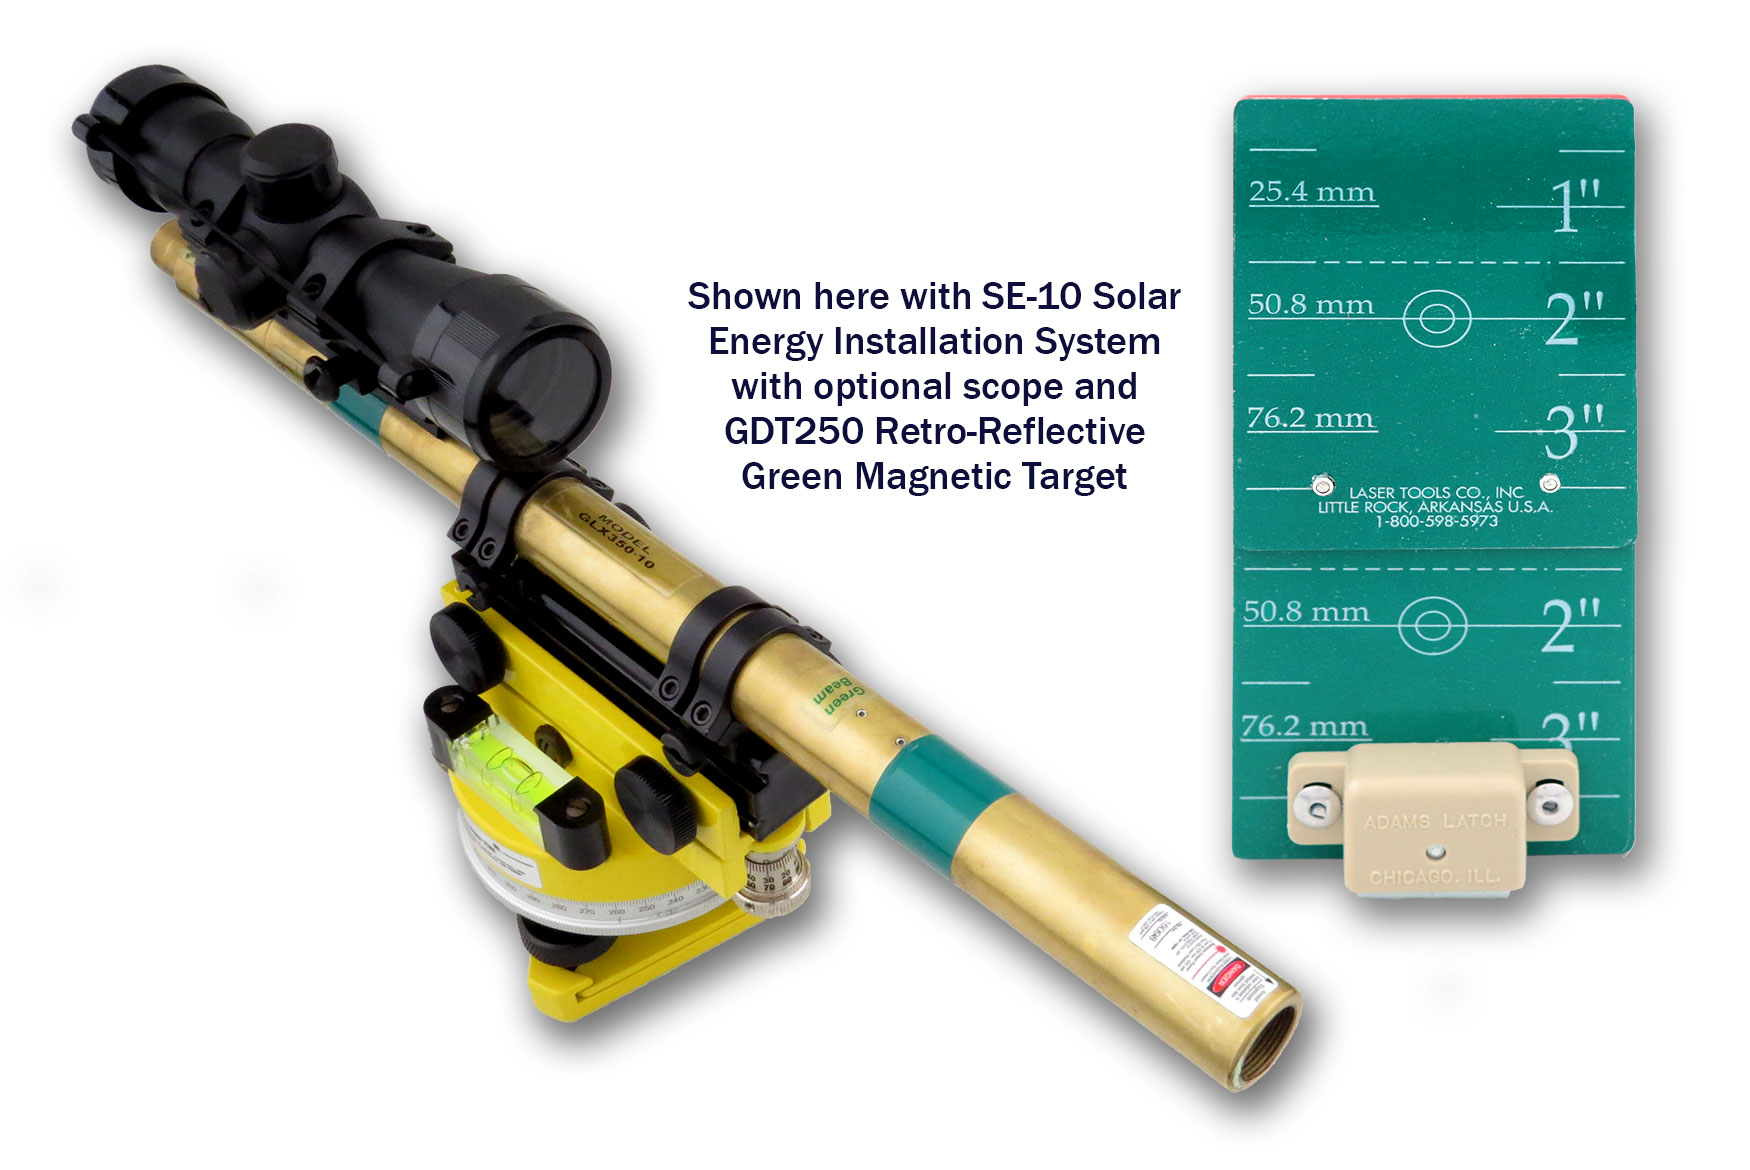
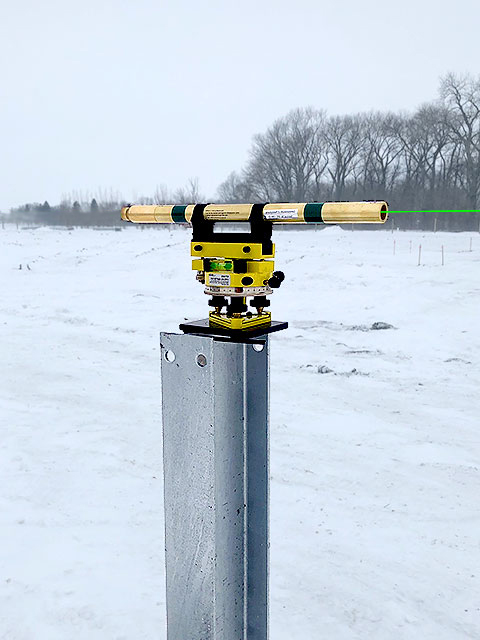
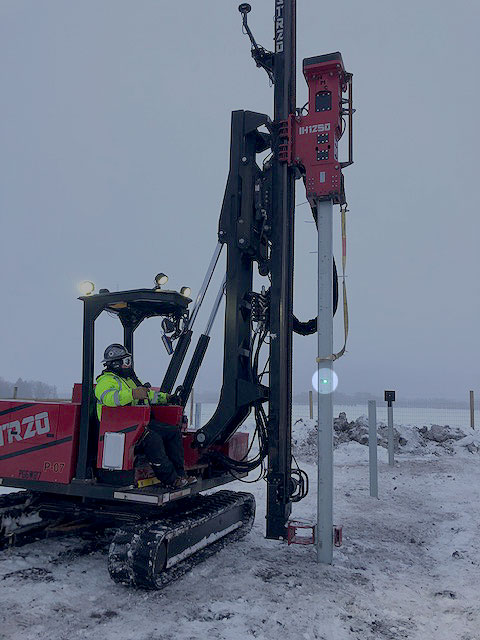
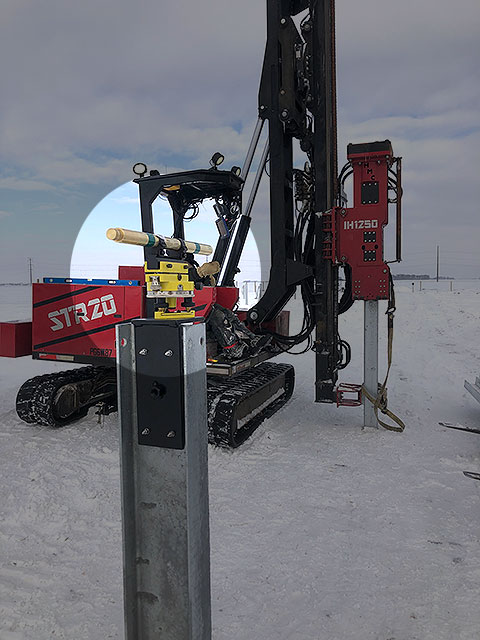
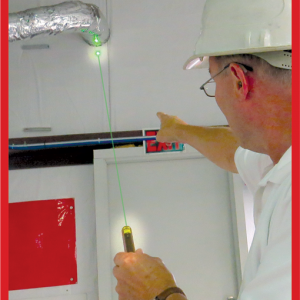
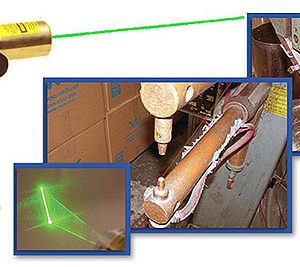
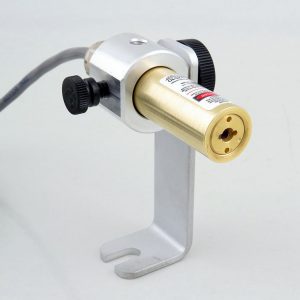
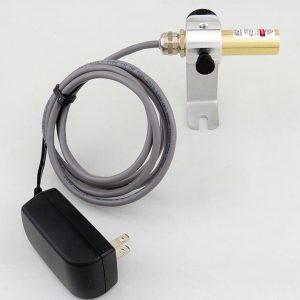
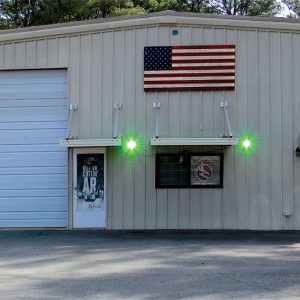
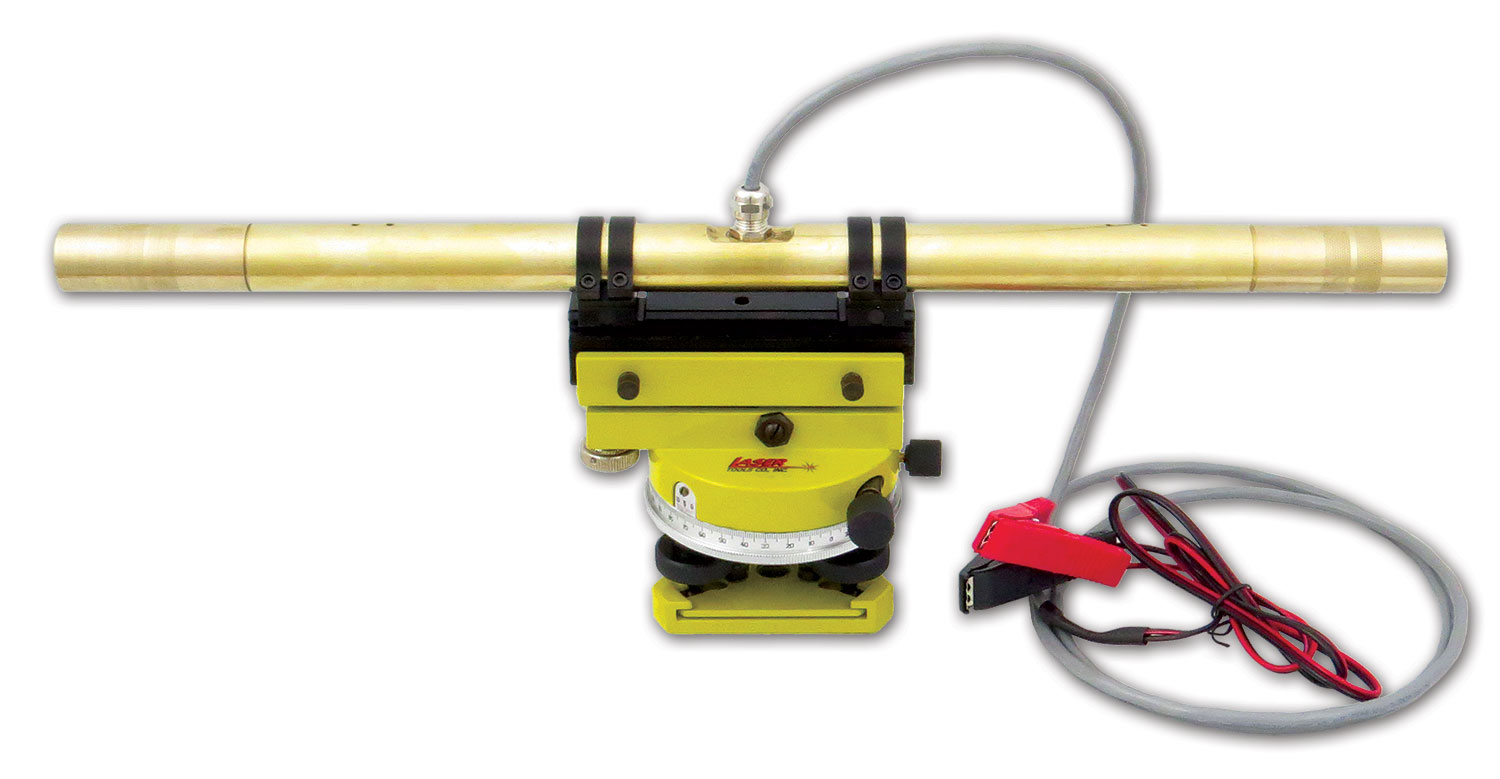
The Solar Energy Installation System produces a green laser beam 30 times brighter in sun light making solar panel installation easier and much more precise. The Model GLX350-10 Green Laser Technology alignment laser uses 520 nanometer green laser light to project a dot with 1/8” accuracy at 100’. When used with Model AP90C Beam Bender™, two laser beams can be created; one concentric to the laser’s brass case for outlining the array on a roof’s pitch and another 90ᵒ beam used to determine crossbeams. When mounted to the AP1000 Tripod Leveling Adaptor Plate, an overall visible range of 1000’ is offered. This makes ground panel installation more efficient and less timely.
The SE-10 Solar Energy Installation System is a kit that consists of the Model GLX350-10 Green Laser Technology Alignment Laser, the AP351- Set of 1” Clamps, an AP353A Magnetic Dovetail Base Mount and the AP1000 Tripod Leveling Adapter Plate.
- Green Laser Technology – 30 Times brighter in sun light
- “O” Ring Sealed – Dust and Waterproof Case
- Battery Powered – AA Alkaline Duracell batteries can be replaced as needed with no Service Support
- 3 Tier Leveling™ – Horizontal Degree Scale, Vertical Micrometer, .1 Degree Vernier along with a magnified 30 min of arc level vial
- Long Distance Alignment – Green laser dot can be seen over a 1,000’
- Secure Mount – Two clamps secure tool with a magnetic dovetail base
- Beam Bending Options – Model AP90C; 90° Beam Bender™, Model AP180C; 360° Beam Spreader™ that generates a line for reference between two points
SE-10 Solar Energy Installation System includes:
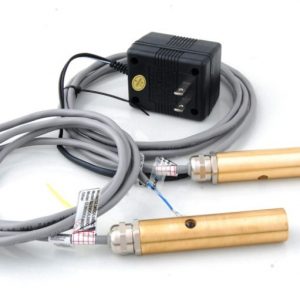
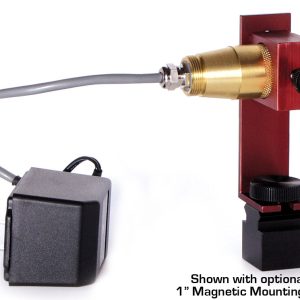
- GLX350-10 – Green Laser Technology Brass Alignment Tool
- AP351 – Set of 1” Diameter Clamps
- AP1000 – Tripod Leveling Adapter Plate
- AP353A – Magnetic Dovetail Mounting Base Plate 5″ Long
- AP46 Foam Filled, Hard Shell Carrying Case 24” x 10” x 12”

View SE-10
Solar Energy Installation
System PDF
Optional Accessories
WP59 Fine Beam Adjustment Optics
SE-4X32 Scope (Includes AP5 Weaver Style Dovetail Mounting Rail)
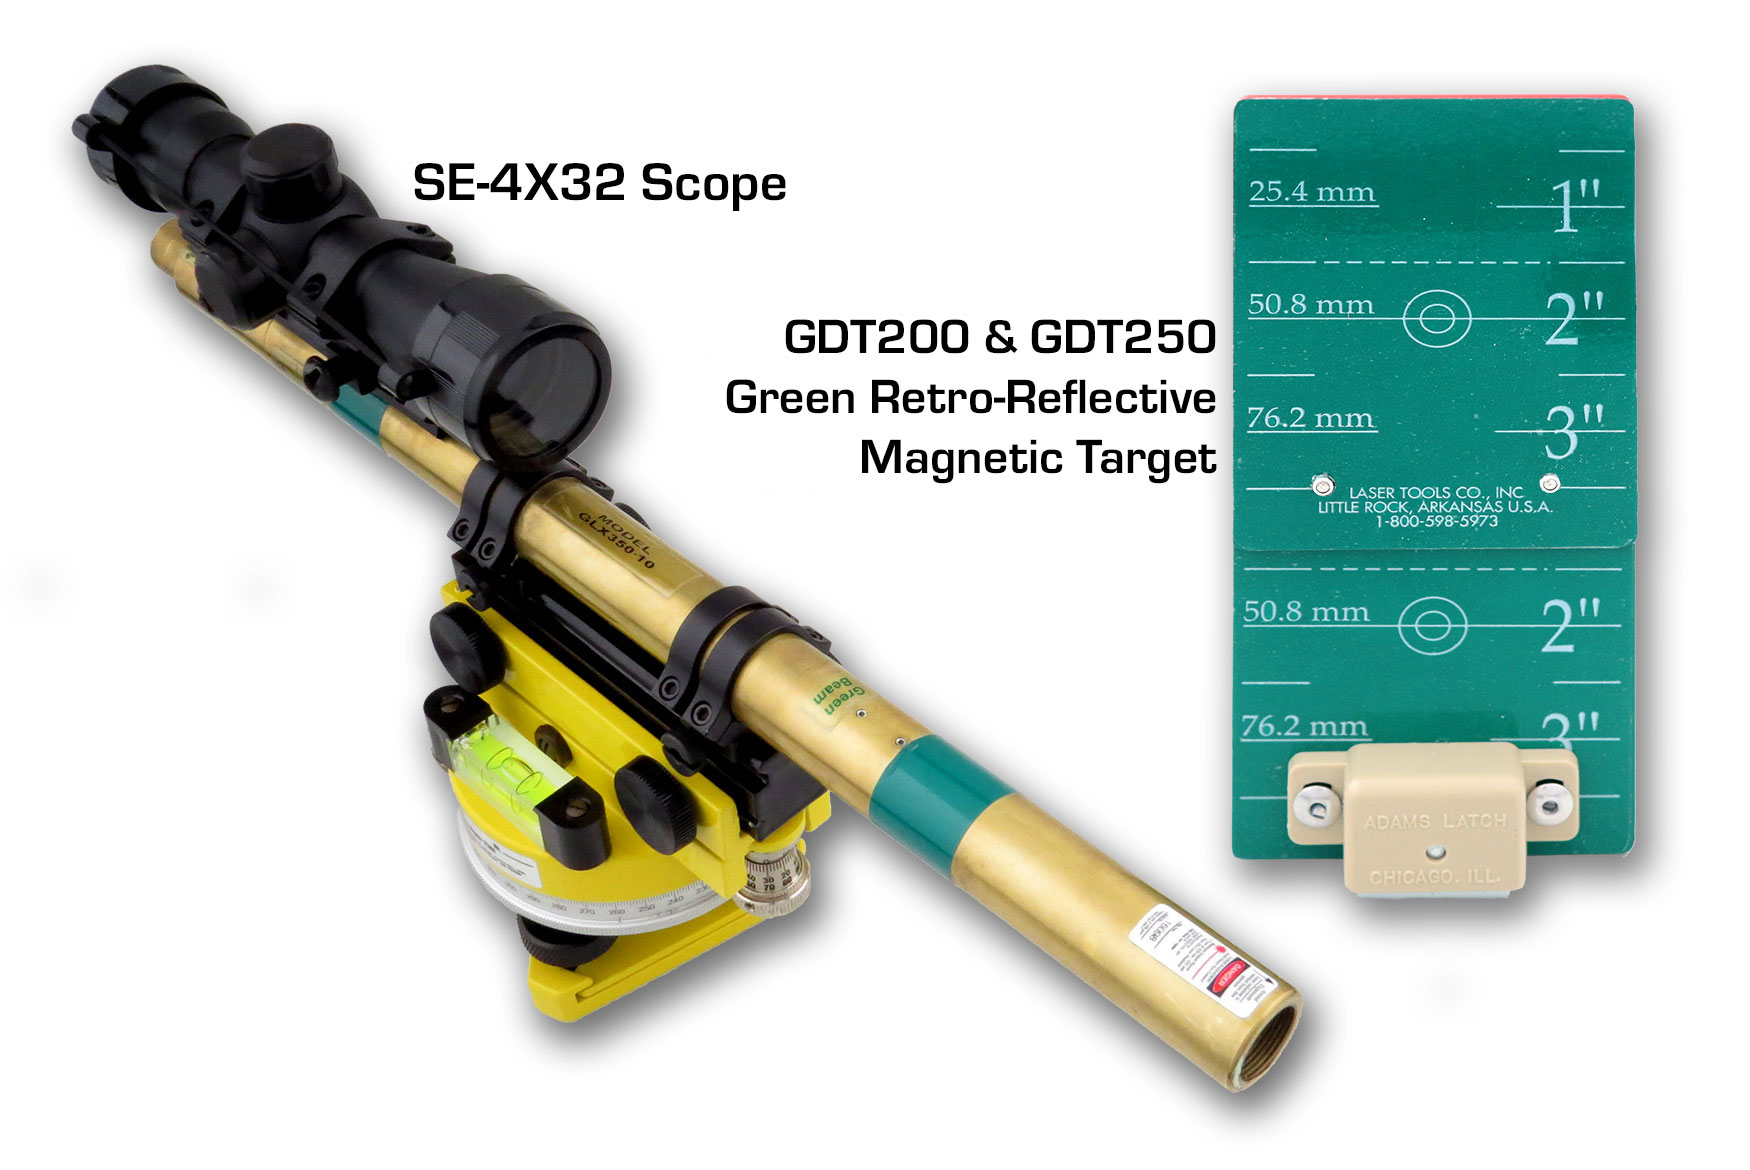
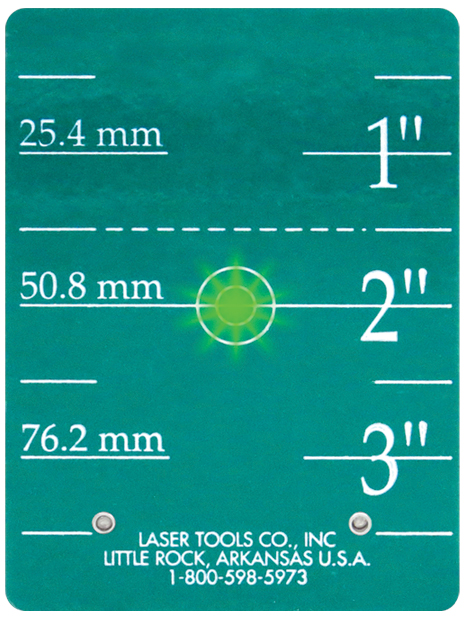
GDT200 & GDT250 Green Retro-Reflective Magnetic Target (sold separately)
A
Operator Instructions
Operation of the laser is simple and straightforward. The laser is shipped with an insulator to prevent the batteries from powering the unit and discharging during shipment and storage. It must be removed from under the Battery End Cap prior to use.
To Initiate First Power: Remove the insulator by unscrewing the battery end cap completely, Remove the cardboard insulator and replace the end cap. The end cap is turned in the clockwise direction until the laser is powered ON. Do not over tighten. Turn the battery end cap in the counterclockwise direction to turn the unit OFF. When the laser fails to power up, the batteries will need to be replaced.
To Replace the Batteries: Unscrew the battery end cap completely, remove the old batteries and inspect the interior of the battery compartment for signs of dirt, moisture or leakage from the previous batteries. Correct any problems with acid leakage or case sealing before installing new batteries, see Cleaning Suggestions. When replacing the batteries, the negative end goes into the laser first. All positive ends must point towards the end cap. All batteries must be replaced at the same time. Do not attempt to reuse batteries or mix batteries of different manufacturers or types. Always replace the batteries in FRESH AIR ONLY!
Battery Note: Replacement of the batteries must be performed in fresh air ONLY. When replacing the batteries, the negative end goes into the laser first. All positive ends must point towards the battery end cap. All batteries must be replaced at the same time. Never attempt to reuse batteries. Do not mix batteries of different manufacturers or types. Do not store tool with batteries inside as corrosion can happen and cause defects to the tool. Other than the batteries, there are no user serviceable parts on the laser.
Cleaning Suggestions: The brass laser case can be cleaned with a metal polish from local store named Brasso®. Polish with a soft fabric until desired shine of brass is achieved. For inside the laser’s brass case; a 1” barrel cleaner adaptor from any Universal Gun Cleaning kit can be used. Do Not use polish or solvent inside the laser’s case. Q-tip with Windex can be used on lens.
Lubricating the Battery Cap “O” Ring can be done with a silicone-based spray lubricant or grease. Apply directly to the “O” ring and DO NOT allow lubricants inside the laser’s case with the batteries.
This product is warranted for a period of one year from the date of purchase for manufacturing defects. The manufacturer reserves the right to repair or replace this product if it fails due to manufacturing defects during the warranty period. Abuse, neglect or disassembly of the laser voids this warranty. Like any other tool, the service that this product will provide is dependent on the care it receives. Please return to the Manufacture addressed below, with proper contact information, for Service and Repair.
WARNING: Do Not Direct the Laser Light into The Eye!
Caution: Use of controls or adjustments or performance of procedures other than those specified herein may result in hazardous radiation exposure. [CDRH: Battery ON/OFF end cap is an alternative to the beam on indicator and beam attenuator requirement.]


Reviews
There are no reviews yet.